LOADING...

Category "Electrical"

29Apr

Guide: How Long Does Electrical Fire Smell Last?

by Nick Quirk

Ever walked into a room, only to be hit by a burning smell without seeing any smoke or flames? That’s often the first sign of an electrical issue lurking behind your walls. The question “how long does electrical fire smell last” isn’t just about discomfort—it’s a red flag waving at you, signaling that something might be amiss with your home’s wiring. While some smells may vanish within hours, others can stick around for days, depending on various factors like material burned and ventilation.

Let’s get straight to what matters here. An enduring burning odor could mean that danger is not far off. But before you panic, understanding what contributes to these odors lingering can help you tackle them head-on.

Understanding the Duration of Electrical Fire Smell in Your Home

An electrical fire smell can linger for hours or even days. The severity of the fire and the materials burned play a big role in how long the odor sticks around.

Plastic and insulation are especially stinky when they burn. Those strong, persistent odors can really take over your home.

Identifying the Source of an Electrical Burning Smell

Common culprits of electrical burning smells include overheated wires, faulty outlets, damaged appliances, and overloaded circuits. Pinpointing the source helps determine how serious the problem is and how long the smell might last.

Factors Influencing the Persistence of Burning Odors

The size of the affected area, the materials involved (especially plastic and insulation), and the ventilation all influence how long an electrical fire smell lasts. Good ventilation helps get rid of the smell faster.

Bottom line: electrical burning odors can stick around for a while, from hours to days. It depends on what caused it and how bad the damage is. The sooner you find and fix the source, the quicker you can clear the air.

Immediate Actions to Take When You Detect an Electrical Burning Smell

If you smell something burning that seems electrical, don’t ignore it. Your first move should be shutting off power at the main breaker. Then call in a pro to track down the source. Don’t try to DIY it – that can be dangerous.

Isolating the Problem Area

Try to narrow down where the smell is coming from – a particular room or appliance. Relay that info to the electrician. It’ll help them zero in on the issue faster.

Turning Off Power Sources

Cut the power to the problem area or the whole house at the main circuit breaker. This prevents further damage and fire risk. It’ll also keep the burning smell from spreading through your home.

Contacting a Professional Electrician

Always call a licensed professional electrician to diagnose and repair electrical problems. Trying to DIY can be super dangerous and lead to more damage or even fire.

The key is acting fast when you smell electrical burning. Shut off the power, isolate the area, and get an electrician on the scene ASAP. It’s the best way to prevent an electrical fire from sparking.

Preventive Measures to Avoid Electrical Fires and Associated Odors

Preventing electrical fires is all about being proactive. Regular checkups on your home’s wiring and smart habits with appliances go a long way.

Catching and fixing issues early stops electrical fires and those nasty burning smells from taking over your home. An ounce of prevention, right?

Regular Inspection of Electrical Systems

Book a licensed electrician to give your home’s electrical setup a thorough check every year. They’ll spot potential wiring problems and make repairs before they turn into fires.

Safe Usage of Extension Cords and Appliances

Prevent overheating and fire risks by using extension cords and appliances safely. Don’t overload electrical outlets. Never use damaged or frayed cords. Follow the manufacturer’s guide for proper use and care of electrical devices.

The formula is simple: Annual electrical inspections + safe practices with cords and appliances = a home protected against electrical fires and gross burning odors. You’ve got the power to prevent the problem.

Health Risks Associated with Electrical Fire Smells

Breathing in the fumes and odors from electrical fires can be toxic, especially if the burning materials are plastic or insulation. We’re talking respiratory irritation, headaches, nausea – nasty stuff.

The scary part? You might not even realize how dangerous those chemical odors are until the symptoms hit. Protect your health by steering clear of electrical fire fumes.

Recognizing Toxic Fumes from Electrical Fires

Electrical fires can release toxic fumes, especially when plastics and insulation are burning. If you’re around an electrical fire and start having trouble breathing, feeling dizzy or nauseous, get to fresh air ASAP.

In severe cases, you might need medical attention. Carbon monoxide poisoning is no joke. If you suspect you’ve breathed in a lot of electrical fire fumes, play it safe and get checked out.

So, when it comes down to it, the stench from electrical fires isn’t just unpleasant; it could actually be harmful to your health. If you smell something burning, get away from the fumes and into fresh air. Your lungs will thank you.

How to Eliminate Persistent Burning Smells After an Electrical Fire

Even after an electrical fire is out, the burning odors can really linger. But you don’t have to just live with the stink. There are ways to clear the air and get your home smelling fresh again.

The first step is always ventilation. Get those windows open and let the fresh air flow. If the smell is really stubborn, you might need to bring in some deep cleaning reinforcements.

Natural Ventilation Techniques

Mother Nature is your BFF when it comes to getting rid of electrical fire smells. Open up windows on opposite sides of the room to get a nice cross breeze going. Set up fans to really get the air circulating.

If the weather cooperates, keep those windows open for hours or even a few days. The more fresh air you can get in, the faster that burnt odor will fade away.

Cleaning and Deodorization Strategies

After airing things out, it’s time to clean. Wipe down surfaces that might have absorbed the smell, like walls, floors, and furniture. A mix of warm water and mild soap or equal parts white vinegar and water usually does the trick.

For really stubborn smells, break out the big guns: commercial deodorizers made for smoke and fire damage. They’re designed to neutralize those tough odors.

With some fresh air, elbow grease, and maybe a specialized product or two, you can eliminate the lingering odors from an electrical fire. Your nose will be so grateful.

Key Takeaway: 

Electrical fire smells can last from hours to days, but you’re not stuck with them. Act fast by shutting off power and calling a pro. Prevent fires with regular electrical check-ups and safe appliance use. Got lingering odors? Open windows and clean well to clear the air.

Conclusion

The essence of addressing an electrical fire smell doesn’t just lie in airing out your living spaces or masking the scent; it revolves around safety first—identifying and fixing the root cause. Whether it sticks around for a fleeting moment or seems to make itself at home among your cozy interiors,

“how long does electrical fire smell last” becomes more than curiosity—it morphs into action towards ensuring our homes remain safe havens rather than ticking time bombs hidden beneath layers of paint and drywall.

In closing, remember this journey through recognizing signs of potential hazards all boils down to vigilance paired with prompt action—your keys to turning unsettling odors from harbingers of doom into mere footnotes in your daily life narrative.

10Apr

Remove Corrosion from Electrical Panels: Easy Steps

by Nick Quirk

Ever glanced at your electrical panel and noticed rust or a mysterious greenish build-up? That’s corrosion for you – sneaky, silent, but potentially harmful to the heart of your home’s electric network. If the idea of jumping into this problem seems overwhelming, trust me, you’re in good company. But fear not! Removing corrosion from an electrical panel isn’t just doable; it’s necessary for maintaining safety and functionality in our homes. This guide will walk you through identifying different types of corrosion that might be affecting your panels and offer practical solutions to clean them up efficiently.

Understanding Corrosion in Electrical Panels

What is Corrosion?

Corrosion is a sneaky little devil that loves to wreak havoc on our precious electrical panels. This is what happens when metal parts slowly start to break down, usually because they’re reacting with stuff in the air or water around them.

When it comes to electrical panels, metal parts like bus bars, breakers, and wiring aren’t immune to the effects of corrosion. So, what you end up with is not just a drop in performance but also the risk of running into some pretty serious safety issues. Not cool, corrosion. Not cool at all.

Types of Corrosion Affecting Electrical Panels

Now, let’s talk about the different types of corrosion that can affect our electrical panels. First up, we have galvanic corrosion. This happens when two dissimilar metals are in electrical contact with each other, and there’s some moisture present.

The less noble metal (the anode) corrodes faster than it would on its own, while the more noble metal (the cathode) corrodes slower. It’s like a weird, corrosive dance party.

But wait, there’s more. We also have to watch out for atmospheric corrosion, which occurs when metal is exposed to oxygen and moisture for an extended period. And let’s not forget about fretting corrosion, where the protective oxide layer gets rubbed away, exposing the metal underneath to corrosion.

Why Corrosion is Detrimental to Electronics

So, why is corrosion such a big deal in electrical panels? Well, for starters, it can lead to increased resistance in connections. This causes overheating and potential fire hazards. No one wants a barbecue in their electrical panel, right?

Corrosion can also cause intermittent or complete failure of components, resulting in equipment downtime and costly repairs. Plus, it can compromise the integrity of the panel enclosure, allowing moisture and contaminants to sneak in and cause even more problems.

In short, corrosion is a real pain in the panel. It’s like that annoying neighbor who always finds a way to ruin your day. But don’t worry, we’ll talk about how to kick corrosion to the curb in just a bit.

Step-by-Step Guide to Removing Corrosion

Safety First: Preparing to Clean the Panel

Before we dive into the nitty-gritty of removing corrosion from your electrical panel, let’s talk safety. First and foremost, make sure the power is completely disconnected. We don’t want any shocking surprises, do we?

Next, gear up with some protective gloves, safety glasses, and a dust mask. You don’t want to get up close and personal with corrosive substances and debris. And while you’re at it, cover the floor beneath the panel with a drop cloth or newspapers to catch any loose material.

Using Natural Cleaners for Mild Corrosion

For mild cases of corrosion, you can whip up a cleaning solution using ingredients you probably already have in your kitchen. Mix a paste of baking soda and water, or grab some white vinegar or lemon juice.

Apply the cleaner to the corroded areas with a soft-bristled brush or lint-free cloth. Let it sit for a few minutes, then gently scrub to remove the corrosion. Wipe away the cleaner and loosened corrosion with a damp cloth, and make sure to dry the area thoroughly.

Tackling Severe Corrosion with Chemical Solutions

For more severe cases of corrosion, you might need to bring out the big guns. And by big guns, we mean commercial electrical contact cleaners or corrosion removers specifically designed for use on electrical components.

Apply the solution according to the manufacturer’s instructions, using a brush or cloth. Be careful not to get the cleaner on any plastic parts, as it may cause damage. Once you’re done, rinse the area with a clean, damp cloth and dry it completely.

So, if you ever find yourself staring down some serious corrosion issues, remember it’s a smart move to get in touch with a professional electrician. They can assess the extent of the damage and recommend the best course of action.

Preventing Future Corrosion in Your Electrical Panel

Importance of Regular Maintenance

Now that we’ve kicked corrosion to the curb, let’s talk about how to keep it from coming back. Staying on top of regular check-ups for your electrical panel goes a long way in keeping rust at bay.

Schedule annual inspections with a qualified electrician to identify and address any signs of corrosion early on. And in between inspections, keep the area around the panel clean and free of moisture, dust, and debris.

Choosing the Right Protective Coatings

After cleaning and drying the electrical panel components, it’s time to give them some extra protection. Apply a protective coating, like a conformal coating, dielectric grease, or rust inhibitor specifically designed for use on electrical connections.

These coatings form a barrier against moisture and contaminants, helping to prevent future corrosion. It’s like giving your electrical panel a superhero cape to fight off the evil forces of corrosion.

Managing Humidity and Water Exposure

Humidity and water exposure are corrosion’s best friends. To keep them at bay, control humidity levels around the electrical panel. In humid climates, consider installing a dehumidifier or using moisture-absorbing products like silica gel packs.

Make sure the panel is properly sealed and located away from potential water sources, such as leaks or flooding. If you live in an area prone to flooding, consider relocating the panel to a higher, safer location.

And there you have it, folks. Your guide to understanding, removing, and preventing corrosion in your electrical panel. Remember, a little maintenance goes a long way in keeping your panel happy, healthy, and corrosion-free.

Corrosion in electrical panels is a big no-no, but with the right steps, you can kick it to the curb. Start by turning off power and suiting up for safety. Use kitchen staples for mild cases or commercial cleaners for tougher jobs. Don’t forget regular maintenance and protective coatings to keep that corrosion at bay.

Conclusion

So there we have it – demystifying the process of how to remove corrosion from an electrical panel. It wasn’t so scary after all, right? Just like any other maintenance task around the house, dealing with corroded panels is about staying vigilant and acting swiftly before small issues escalate into larger problems. Whether you’re grabbing baking soda for a DIY cleanup or calling in a professional electrician for more severe cases, what matters most is taking that first step towards ensuring the health of your home’s electronic heartbeat remains strong.

Remember those movies painting AI as humanity’s biggest threat? Well, much like those exaggerated tales, letting myths about electrical maintenance intimidate us only holds back progress—both within our homes’ walls and beyond them.

The tools are in our hands (sometimes literally) to safeguard against potential dangers lurking behind those metal doors—be it through regular cleaning schedules or embracing new technologies designed specifically for such tasks. Let’s lean into these opportunities without hesitation because maintaining a secure environment starts with understanding exactly what needs fixing—and now you know just how to tackle one key piece!

10Apr

Guide: Signs You Need an Electrician

by Nick Quirk

Ever walked into a room, flipped the switch, and… nothing? Or maybe you’ve noticed your lights flicker more often than not. It’s easy to brush these moments off as just another quirk of your home. But sometimes, they’re early whispers from your house trying to tell you something important – like it might be time to call in a professional electrician. From strange noises coming from your outlets to that one light switch that gives you a slight zap, knowing when to get help can save you not only from potential danger but also hefty repair bills down the line.

Identifying Electrical Problems: Signs You Need an Electrician

Electrical issues can be a real headache. But, sometimes it’s not so obvious when you need an electrician. Read on to learn seven telltale signs you need to call an electrician.

Visible Sparks and Blowing Fuses

Is your circuit breaker tripping fuses frequently? If so, you need an electrician.

Visible sparks from an outlet or appliance are a huge red flag. Don’t ignore this – it’s a fire hazard. Get an electrician out ASAP to diagnose and fix the issue before it turns into a full-blown disaster.

Flickering Lights and Humming Sounds

Flickering lights aren’t just annoying – they can indicate a deeper electrical problem. If your lights are doing a disco dance, it’s time to call in a pro.

Humming or buzzing sounds coming from outlets or switches are another warning sign. These sounds can mean loose wiring or other issues that need an electrician’s attention.

Older Home Systems and Lack of Outlets

Older homes have a charm but often have outdated and potentially hazardous electrical systems. If you’re moving into an old house or planning to remodel one, consulting an electrician makes perfect sense to ensure the safety and functionality of your home’s electrical system.

A lack of outlets, resulting in a tangle of extension cords, is a common issue in older homes. This is more than just an eyesore – it’s an electrical hazard. An electrician can add outlets and upgrade your system to modern standards.

Unusual Burning Smell or Warm Outlets

If you notice a burning smell coming from an outlet or switch, turn off the power immediately and call an electrician. This odor can signal overheating wires, which can quickly lead to an electrical fire.

Outlets that feel warm to the touch are another cause for concern. While a little warmth is normal with high-powered appliances, excessive heat indicates a wiring issue that needs professional attention.

Understanding Your Electrical System: When to Call an Expert

The electrical system in your house is a bit like a team, with various players—wires, sockets, switches—all working in sync to make sure your lights stay bright and your gadgets keep buzzing along. Figuring out the perfect time to call in a pro can save your wallet from taking a hit and keep you clear of any safety nightmares.

Our electricians in Bucks County and surrounding area are ready to help if you cannot figure it out.

Persistent Issues Lasting Over an Hour

If you’re experiencing electrical problems that last more than an hour, it’s time to call an electrician. Persistent issues can indicate a more serious underlying problem that requires professional diagnosis and repair.

Don’t try to tough it out or DIY a fix. Electrical systems are complex, and attempting repairs without proper knowledge can be dangerous and may even void your insurance coverage.

Frequent Light Bulb Burnouts

If you find yourself constantly replacing light bulbs, it might not be the bulbs themselves causing the problem. Frequent burnouts can signal a wiring issue that’s causing too much voltage to flow to the bulb.

An electrician can diagnose the issue and make necessary repairs to prevent premature bulb failure and potential electrical hazards.

Dead or Loose Outlets

Dead outlets are more than just an inconvenience – they can indicate a wiring problem that needs professional attention. Loose outlets, where plugs fall out easily, are another red flag.

Loose connections can cause arcing and sparking, which can lead to electrical fires. A skilled electrician has the know-how to tighten up those connections and swap out any outlets that aren’t doing their job, all in the name of keeping your home a safe zone.

Brown or Black Marks Around Your Outlets

If you notice brown or black marks around your outlets, it’s a sign of arcing or short-circuiting. This can be caused by loose wiring, damaged insulation, or other issues.

These marks are a serious fire hazard and should be addressed by an electrician immediately. Turning a blind eye to this issue might just light the fuse for an electrical fire that could wreak havoc.

Electrical Safety Hazards: Warning Signs You Shouldn’t Ignore

Electricity is a powerful force that we rely on every day. However, when electrical systems start acting up, they can quickly become a major safety concern. Knowing the warning signs of electrical problems can help you avoid dangerous situations and keep your home and family safe.

Electric Shocks and Burning Smells

If you feel a shock or tingle when touching an appliance or outlet, it’s a clear sign of an electrical issue. Even a minor shock can indicate a major problem that needs immediate attention from an electrician.

A burning smell coming from outlets, switches, or appliances is another red flag. This odor can signal overheating wires or other components, which can quickly lead to an electrical fire.

Power Outlets in Contact with Water

Water and electricity are a dangerous combination. If you notice outlets or switches near water sources, such as in bathrooms or kitchens, it’s essential to have them checked by an electrician.

Ground Fault Circuit Interrupter (GFCI) outlets should be installed in these areas to prevent electrical shocks and potential electrocution. An electrician is your go-to pro to make sure all your outlets are up to snuff with the latest safety standards.

Power Loss and Flickering Lights

Losing power to a specific room or appliance can indicate a tripped breaker or blown fuse. While this can happen occasionally, frequent power loss should be investigated by an electrician.

Flickering lights are another warning sign that shouldn’t be ignored. This can be caused by loose wiring, overloaded circuits, or other issues that require professional diagnosis and repair.

Presence of Rodents or Pests

Rodents and pests can wreak havoc on your electrical system. They can chew through wires and insulation, causing short circuits and potential fire hazards.

If you suspect rodents or pests in your home, have an electrician inspect your wiring for damage. An exterminator can help remove the pests, but an electrician is needed to repair any electrical damage they may have caused.

Why Routine Maintenance on Electrical Systems is Crucial

Your home’s electrical system is like a car – it needs regular maintenance to keep it running smoothly and safely. Routine check-ups by a licensed electrician can prevent minor issues from turning into major problems, saving you money and stress in the long run.

Preventing Tripping Circuit Breakers

Circuit breakers jump into action and trip whenever a circuit gets too loaded, acting as our unsung heroes to stop electrical fires before they start. However, frequent tripping can indicate a more serious issue, such as faulty wiring or an overloaded system.

An electrician can diagnose the cause of frequent circuit breaker trips and make necessary repairs or upgrades to prevent future issues. This can include adding circuits, replacing outdated wiring, or installing a higher-capacity electrical panel.

Avoiding Flickering or Dimming Lights

Flickering or dimming lights can be more than just a nuisance – they can indicate a problem with your electrical system. Loose wiring, overloaded circuits, or failing components can all cause this issue.

Regular maintenance by an electrician can catch these problems early, before they lead to more serious issues like electrical fires or power outages.

Ensuring Adequate Number of Outlets

As our reliance on electronic devices grows, so does our need for electrical outlets. Older homes often lack sufficient outlets, leading to overloaded circuits and potential fire hazards.

An electrician can assess your home’s electrical needs and install additional outlets as needed. This can prevent overloading and ensure your home’s electrical system can handle modern demands.

Addressing Older Wiring Issues

Older wiring, such as knob-and-tube or aluminum wiring, can pose serious safety hazards. These outdated systems may not meet current electrical codes and can be prone to overheating or failure.

An electrician can inspect your home’s wiring and recommend upgrades or replacements as needed. This can bring your electrical system up to modern safety standards and give you peace of mind.

Don’t ignore electrical warning signs like flickering lights, unusual smells, or warm outlets. Call an electrician to keep your home safe and up-to-date.

Conclusion

So there we have it – turning full circle back to where we started yet now armed with knowledge on how to tell if you need an electrician. Remember those flickering lights or the outlet that feels warm? They were never just quirks; they were silent alarms. So, as we’ve wandered through today’s adventure of spotting warning signs and figuring out when it’s time to call in the pros, we’ve made some solid moves towards making our homes not just safer but more efficient places for all of us to live.

The truth about electrical issues is far less dramatic than any Hollywood plot twist but significantly more impactful in our daily lives. Acting at just the right moment helps us dodge potential problems, leading to a peaceful vibe inside our homes.

If anything resonated with what I shared today – whether it’s been seeing shadows dance across your walls thanks to dimming lights or getting mini heart attacks from unexpected shocks – let this be the nudge needed towards making that crucial call. Because at end of day safety isn’t just paramount; it’s everything.

10Apr

Guide: What Is Level 2 EV Charger?

by Nick Quirk

Imagine plugging in your electric vehicle (EV) at night and waking up to a fully charged car ready to tackle the day. This piece dives deep into how these chargers work, offering faster charging times that turn hours into mere minutes of waiting. You’ll get insights on easy installation processes, comparing costs and ultimately picking the perfect model for your needs.

QG Smart Home offers EV charger installs, our electricians in Bucks County are ready to help with your next EV Charger!

We’ll also explore how integrating Level 2 EV chargers can significantly boost your driving range with minimal downtime, making them an ideal choice for both home and public use. By the end of this read, you’ll have all you need to make informed decisions about upgrading from a standard outlet to a more efficient charging solution for your electric ride.

The Basics of Level 2 EV Chargers

Understanding the Functionality and Benefits

Imagine needing less time to fuel your electric car than it takes to watch a couple of episodes of your favorite TV series. That’s where Level 2 EV chargers come into play, stepping up from the slower pace of their Level 1 counterparts. Unlike standard outlets that offer a meager power source, these chargers use a robust 208-240v power supply, which can pump energy into your vehicle’s battery up to eight times faster.

This speed boost means you’re looking at significantly reduced charging times for your electric vehicle (EV). Specifically, while a typical charger might trickle charge an EV overnight or longer, a Level 2 charger slashes this time dramatically, letting drivers regain about 20 to 30 miles of range per hour plugged in. This is especially handy if you forgot to plug in the night before or need an urgent top-up before heading out.

Besides just being quicker at replenishing your ride’s juice, these chargers are marvels when considering ease-of-use and compatibility with various vehicles. Thanks mostly to standardized ev charging connectors like those found on many models today—installation is usually straightforward too. And although installing one may seem daunting initially—with costs potentially hitting over $1,000 when factoring in professional help—it’s an investment that pays dividends in convenience and efficiency down the road.

Folks often wonder about the real difference between alternating current (AC) versus direct current (DC) fast chargers; it boils down primarily to how much time you’ve got on hand and how quickly you need that full tank. While DC offers lightning-fast speeds perfect for quick pit stops during long trips—a bit like swinging by for gas—level two stations provide more practical everyday solutions without breaking the bank or requiring hefty infrastructure changes akin to what commercial properties face.

Level 2 EV chargers are game-changers, making electric car charging way faster and more convenient. They turn what used to be an overnight task into just a few hours, giving your ride enough juice for about 20 to 30 miles per hour of charging. Easy to install and compatible with most vehicles, they’re a smart pick for everyday use.

Installation Insights for Level 2 EV Chargers

Deciding to install a Level 2 EV Charger at home is like upgrading from a slow, drip coffee maker to an espresso machine—it’s all about speed and efficiency. But before you can enjoy that quick jolt of electricity into your electric vehicle (EV), there are some key steps and considerations.

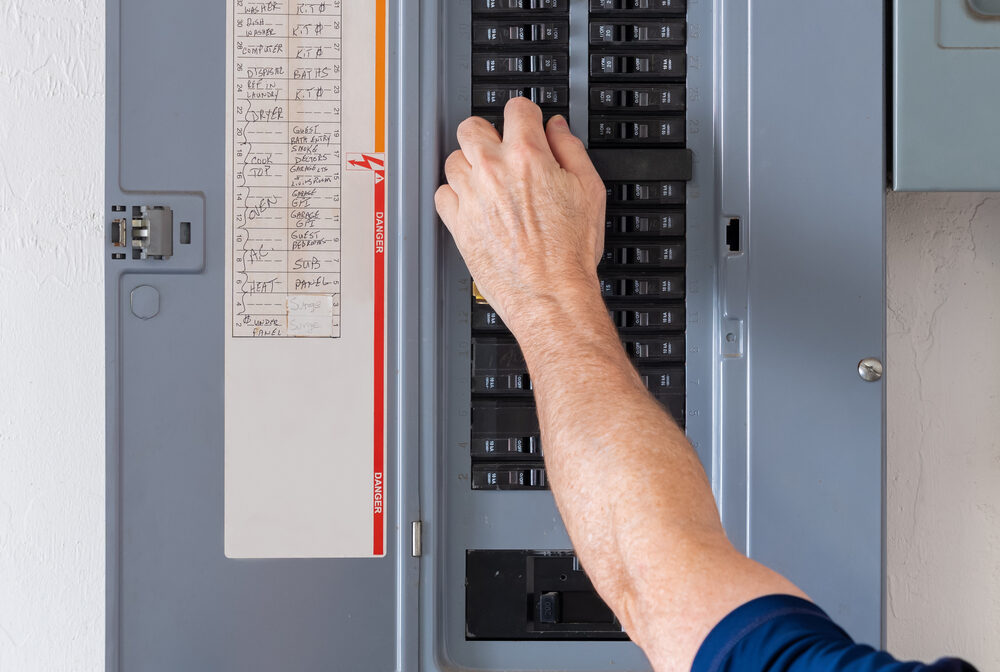
First off, understand that installing a Level 2 charger requires more than just plugging it into any old outlet. These chargers need a dedicated circuit because they use a power source ranging between 208-240v, similar to what powers clothes dryers in many homes. This setup delivers power up to eight times faster than its Level 1 counterparts, making sure your car gets back on the road quicker.

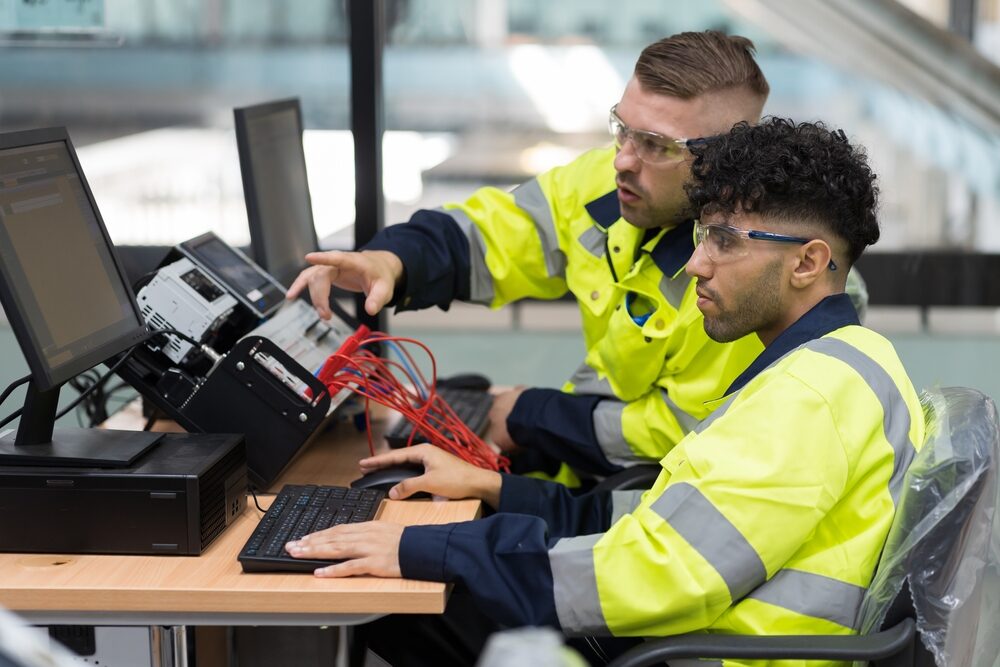
To get started, you’ll need help from certified electricians who have experience with the electrical infrastructure necessary for these types of installations. They will ensure everything is up to code and safely installed so that when you plug in your car, everything works seamlessly.

Cost Breakdown and Financial Incentives

The sticker shock of setting up your first home-based charging station might make you pause—installing the initial level two charger can cost at least $1,000 due primarily to needing a dedicated circuit along with professional installation by certified electricians. However, considering this as an investment towards convenience and long-term savings should ease that concern somewhat.

Luckily, financial incentives may be available, including rebates or tax credits offered by local governments or utility companies aimed at encouraging EV adoption. Such programs could significantly offset installation costs while supporting eco-friendly transportation options. Remember though: specific details vary based on location; always check local resources for current offers.

Upgrading to a Level 2 EV Charger boosts charging speed, but it requires professional installation and a dedicated circuit. While the upfront cost may be high, rebates or tax credits can help offset expenses, making it an investment in convenience and sustainability.

Selecting Your Ideal Level 2 Charger

Compatibility Checks

When you’re in the market for a level 2 EV charger, think of it like finding a soulmate for your electric vehicle (EV). Compatibility is key. You want to ensure your electric car matches with your chosen charger’s specifications perfectly. With power output ranging from 6.2 to 19.2 kW and average charging times around 3-8 hours, choosing the right level 2 EV charger can make or break your daily routine.

To kick things off on the right foot, start by checking what kind of charging connectors are supported by both your vehicle and potential chargers. While most EVs use a standard J1772 connector for AC power, some brands have proprietary connections that could limit your options or require adapters.

Next up is ensuring that the electrical infrastructure at home can handle installing a level two charging station without hiccups – think along lines similar to adding an appliance as demanding as clothes dryers but even cooler because it powers up adventures instead of drying socks.

If all this sounds daunting, remember help is always available. Certified electricians who specialize in installing EV chargers can not only give you peace of mind about safety but also advise on maximizing efficiency and minimizing costs associated with upgrading electrical systems if needed.

Budget considerations should never be overlooked either; while selecting among different models or brands like EvoCharge EVSE may initially seem driven primarily by features such as faster charging times or easy installation perks, don’t forget ongoing electricity expenses will follow you much longer than any sticker shock might last upon purchase.

Finding out more about financial incentives offered through federal rebates and local utility programs could sweeten the deal significantly when comparing overall cost factors between options—because who doesn’t love saving money while doing good for planet Earth?

Finding the perfect level 2 EV charger means checking compatibility, ensuring your home’s ready for installation, and considering costs. It’s like matching a soulmate to your EV—get it right, and you’re set for efficient charging and savings in the long run.

Charging Speeds and Efficiency

Imagine you’re at a gas station, but instead of filling up in minutes, it takes hours. That’s the electric vehicle (EV) world without Level 2 chargers. But here’s where the game changes. Level 2 EV Chargers turn that waiting game into something much more manageable.

These chargers use a power source ranging from 208 to 240 volts, significantly reducing charging time compared to their Level 1 counterparts. Think about going from snail pace with a standard outlet to hopping on an express train; that’s what upgrading to Level 2 feels like for your EV.

Understanding Charging Speeds of Level Two EV Chargers

The beauty of these chargers is their ability to deliver about 30 to 50km (20 to 30 miles) of range per hour. This means less time tethered to a charger and more time hitting the road. For those looking for faster charging times without breaking the bank or rewiring their entire home electrical system, this is your sweet spot.

Beyond just speed, energy efficiency plays a massive role in why people choose level two chargers. They intelligently charge your car by using alternating current (AC), which most homes readily supply—no need for expensive conversions or upgrades.

Moving onto installation insights; don’t let fear stop you. Installing one might sound daunting but think about this: many electric dryers use similar voltage requirements and have been safely installed in homes for decades. Yes, installing your first charger can be pricier due mainly because it requires dedicated circuits and sometimes even new electrical infrastructure but remember—it’s an investment towards efficiency and convenience.

To put it simply: getting yourself equipped with a level two charger isn’t just about cutting down charging times; it’s also making sure every electron powering up your ride counts towards better energy usage—and who wouldn’t want that?

Level 2 EV chargers are game-changers, slashing charging times and boosting efficiency. They’re like hopping on an express train compared to the snail pace of Level 1 chargers, offering a faster, smarter way to power up your ride without needing major home upgrades.

The Cost Factor

Breaking Down the Numbers

When we talk about installing a level two EV charger, it’s not just about plugging in and zooming off. The total cost is a mix of purchase price plus installation fees. Initially, setting up your first Level 2 charging station can make your wallet feel a bit lighter by at least $1,000. This includes getting that dedicated circuit in place and hiring a certified electrician to do the job right.

If you’re thinking ahead for future installations, here’s some good news: they may be less expensive thanks to the existing electrical infrastructure you’ve put in place. So while the initial bite might sting, it eases up as you go along.

Installation costs aren’t just numbers pulled out of thin air; they hinge on several factors like your home’s current electrical setup and how far away from power sources you want your charging station to be. You might also stumble upon financial incentives offered by local governments or utilities companies designed to lighten the load on your pocketbook when making this eco-friendly shift.

A little homework goes a long way—checking out available rebates or tax credits before starting can save significant bucks. Energy.gov has more info on these perks.

Ongoing Expenses vs Savings Over Time

After coughing up for installation and setup, running expenses come down mainly to electricity usage rates which vary widely depending on where you live but tend towards being much lower than fueling up at any gas station with fossil fuels.

This switch doesn’t just promise savings over time but actively demonstrates them as electric vehicle (EV) drivers witness their spending dwindle compared to traditional car owners—a win-win situation if there ever was one.

Getting a Level 2 EV charger means upfront costs but think long-term gains. The initial setup may pinch your wallet, but savings and possible rebates sweeten the deal over time. Always do your homework on financial aids to ease the bite.

Level Two Charging Networks

Imagine a world where charging your electric vehicle (EV) is as simple and ubiquitous as filling up at a gas station. That’s the vision behind Level Two EV Chargers in Public Charging Stations, which are becoming more common by the day. These chargers strike an appealing balance for businesses due to their cost-effectiveness compared to DC fast charges, despite being a bit slower.

Understanding Networked vs Standalone Units

The integration of Level 2 chargers into public spaces has been nothing short of revolutionary for EV owners. Unlike their solitary counterparts, networked units connect to larger systems that offer benefits like real-time availability updates and mobile payment options. However, standalone units still hold value for places seeking simpler solutions without ongoing costs associated with network connectivity.

This blend of technology means drivers can enjoy faster charging times than they would at home with standard outlets but without needing the extensive infrastructure required by DC fast chargers. In essence, these stations level the playing field between traditional fueling methods and electric charging.

A Look at Cost-Effectiveness for Businesses

For businesses considering installing EV chargers, Level Two models present an attractive proposition. They’re significantly less expensive than their high-powered DC counterparts yet provide service that meets or exceeds the needs of most customers looking to charge while they shop or work—a perfect fit for commercial properties and workplaces alike.

This approach not only draws in eco-conscious consumers but also positions businesses as forward-thinking leaders in sustainability efforts—without breaking the bank on installation costs.

In summary, adopting Level 2 charging networks offers a practical solution that bridges current technological gaps while paving the way towards more environmentally friendly transportation infrastructures around our cities and towns—it’s easy installation with profound impacts both economically and ecologically speaking.

Level 2 EV chargers offer businesses a cost-effective, eco-friendly way to attract customers by providing quick charging options without the hefty price tag of DC fast chargers. They’re perfect for integrating into public spaces, making electric vehicle charging as common and straightforward as traditional fueling.

Environmental Impact & Sustainability

Adopting level two EV charges isn’t just about skipping the gas station; it’s a leap towards reducing our carbon footprint. These chargers play a pivotal role in steering us away from fossil fuels and embracing renewable energy sources. Let’s break down how this shift impacts our planet.

Environmental Benefits Of Level Two Ev Charges

The beauty of level two EV charges lies not only in their efficiency but also in their environmental benefits. By encouraging electric vehicle (EV) usage, these charging stations help diminish reliance on oil and gas, thereby cutting down emissions that contribute to global warming and air pollution. It’s a cleaner, greener way to keep cars running.

Furthermore, when paired with renewable energy sources like solar or wind power, the sustainability factor skyrockets. Imagine your car being powered by the sun or the breeze – it turns every trip into an eco-friendly journey. This synergy between EVs and clean energy is crucial for achieving long-term sustainability goals.

A noteworthy point is that adopting EV charges aids significantly in lessening dependence on non-renewable resources while promoting utilization of green alternatives. This transition not only supports ecological balance but also propels us towards a more sustainable future where clean air isn’t a luxury but a norm.

Key Stats: A Green Transition

The stats are telling: making the switch to electric vehicles equipped with level two charging facilities helps cut back on harmful pollutants dramatically compared to traditional gasoline-powered cars. Notably, this adoption encourages wider use of renewable energies as people seek out cleaner ways to charge up their rides.

This green shift doesn’t just promise clearer skies; it heralds an era where technology harmonizes with nature instead of harming it—an essential step forward for anyone concerned about our planet’s health.

Switching to level 2 EV chargers is more than convenience; it’s a bold move towards slashing our carbon footprint and championing renewable energy, making every ride an eco-friendly adventure.

Conclusion

By now, understanding what is level 2 EV charger should be clear. It’s a game-changer for EV owners, cutting down charging times significantly.

This journey revealed the nuts and bolts of Level 2 chargers – from their faster charging speeds to the installation process. Key takeaways? They’re not just quicker; they’re smarter investments for both home and public use.

Picking the right model means aligning power output with your electric vehicle’s needs. Remember, it’s about matching compatibility to maximize efficiency.

The cost might seem steep at first glance but weigh it against long-term savings on fuel and reduced carbon footprint. It pays off.

In essence, diving into the world of Level 2 EV chargers opens up a realm of possibilities for extending driving ranges without lengthy downtimes or frequent gas station visits. Make the switch; you won’t regret it.

4Apr

Guide: Are Backup Generators Worth It?

by Nick Quirk

Guide: Are Backup Generators Worth It?

Hint: A Backup Generator is Totally Worth it, Find Out

Wondering about the worth of backup generators? You’re not alone. In a world where power outages seem more frequent than ever – thanks to extreme weather or unexpected events – the question “are backup generators worth it” pops up regularly. It’s not just about making sure the lights stay on; it’s also about keeping a sense of normality when everything else seems to be in disarray. With an average ROI that hits staggering heights, according to some reports as high as 3800%, diving into what makes these machines tick isn’t just smart; it’s essential.

QG Smart Home offers generator installations in Montgomery County, PA, smart home installs, EV charge installation and more. Give us a call for a free estimate.

But let’s get real here – navigating through endless options from portable units to whole-home systems can feel like you’re trying to solve a puzzle without all the pieces. Yet, with potential threats ranging from spoiled groceries to basement floods lurking around every corner when power goes down, making this decision feels more pressing than ever.

What Are Backup Generators and How Do They Work?

A backup generator is your home’s plan B for electricity during a power outage. It’s a portable unit that steps in to keep your lights, fridge, and other essentials running when the main power supply cuts off. Unlike its standby cousin that jumps into action automatically, a backup generator requires a hands-on approach. You’ll need to start it manually and connect it to your appliances using extension cords. It’s a straightforward, temporary solution to keep your household humming until the main power returns.

Types of Backup Generators

Diving into the world of backup generators, you’re certainly not short on choices. The most common types are portable generators and standby generators. Portable generators are the more affordable choice. They’re a breeze to tote around, snug and neat, not to mention they can keep your must-have gadgets humming along. On the flip side, standby generators are permanently installed and can provide power to your entire home. They’re pricier but offer more convenience and capacity.

How Backup Generators Operate

So, how do these power-providing machines work their magic? Most backup generators run on gasoline, propane, or natural gas. When the power goes out, you fire up the generator, which converts the fuel into electricity. That electricity flows through the generator’s outlets, where you can plug in extension cords to power your appliances. Some standby generators can even connect directly to your home’s electrical system, automatically kicking in when the power goes out.

Benefits of Having a Backup Generator

In short, a backup generator isn’t just an appliance; it’s a resilience booster for your home, a guardian for your digital life, a defender of dinner, and a silent sentinel for your health and comfort. Storms, accidents, and power outages occur. When they do, will you be alone in the dark, or will you have alternatives? Among these alternatives are backup generators. So, you’ll come across various types each with its own price tag, but rest assured, they’re all worth the investment in the end.

Reasons to Invest in a Backup Generator

A backup generator is like your home’s trusty sidekick, ready to jump in when the main power takes an unexpected break. Here’s why having one is a bright idea: A generator is your fridge’s best friend during a blackout. It’s the hero that stops your ice cream from melting and keeps those special cuts of meat in your freezer just as fresh as you like them. But it’s not just about saving snacks. A backup generator can keep your sump pump running during a storm, preventing a flooded basement. It can power your furnace or air conditioner, maintaining a comfortable temperature in your home no matter the weather outside.

Maintaining Quality of Life

For those relying on medical devices, a backup generator isn’t just convenient; it’s essential. It ensures that critical healthcare equipment keeps running, offering peace of mind and safety when it’s needed most. Even if you don’t have medical needs, a generator can help maintain your quality of life during an outage. You can keep your phones and laptops charged, stay connected with loved ones, and even continue working from home if needed. If you live in an area prone to heavy rains or hurricanes, a backup generator can be a lifesaver. When the power goes out during a storm, your sump pump stops working. Without it, water can quickly flood your basement, causing extensive damage. A generator can keep your sump pump running, even during an extended outage. Putting a little money in now can save you from big repair bills and headaches later on.

Keeping Perishables Fresh

We’ve all experienced the dread of opening the fridge after a long power outage, bracing ourselves for the smell of spoiled food. With a backup generator, you can keep your perishables fresh and your stomach happy. A generator can power your refrigerator and freezer, preventing food waste and the hassle of restocking everything after an outage. This little luxury could be the game-changer your daily routine has been missing.

Choosing the Right Backup Generator for Your Needs

So, you’ve decided to invest in a backup generator. Great choice. But with so many options out there, how do you pick the perfect one for your home? Here are a few key factors to consider: The first step is to figure out how much power output you need. Make a list of the essential appliances and devices you want to keep running during an outage, and add up their wattage. A small portable generator can typically handle around 2,000 to 4,000 watts, enough for a few lights, a fridge, and a phone charger. A larger standby generator can produce 10,000 watts or more, enough to power your entire home.

Fuel Source Options

Next, consider your fuel source. Gasoline is readily available and portable generators usually run on gas. However, it has a short shelf life and can be dangerous to store in large quantities. Propane is another popular option. It has a longer shelf life than gasoline and is safer to store. Natural gas is a convenient choice for standby generators, as it connects directly to your home’s gas line. However, if the natural gas supply is disrupted during a disaster, your generator won’t be able to function.

Installation and Maintenance Costs

Don’t forget to factor in installation and maintenance costs when budgeting for your generator. Portable generators are relatively easy to set up and maintain, but standby generators require professional installation and regular servicing. Installation costs for a standby generator can range from a few thousand to over ten thousand dollars, depending on the size and complexity of the job. Annual maintenance can cost a few hundred dollars, but it’s essential to keep your generator in top shape and ready to go when you need it.

Standby Generators vs Portable Generators: Which is Better?

When it comes to backup power, you’ve got two main options: standby generators and portable generators. Both have their pros and cons, so let’s dive in and compare the two. Standby generators are the ultimate in convenience and reliability. They’re permanently installed outside your home and connected directly to your electrical system. When the power goes out, they automatically kick in within seconds, providing seamless backup power to your entire home. Standby generators are also more powerful than portable generators, capable of producing 10,000 watts or more. They run on natural gas or propane, so you don’t have to worry about refueling them during an outage.

Benefits of Portable Generators

Portable generators, on the other hand, are more affordable and flexible. You can move them around as needed and store them away when not in use. They’re perfect for powering a few essential appliances during a short outage or for taking on camping trips and tailgates. Portable generators typically run on gasoline and can produce 2,000 to 8,000 watts of power. They require manual setup and refueling, but they’re a great option if you don’t want to invest in a permanent standby generator.

Comparing Costs and Convenience

When it comes to cost, portable generators are the clear winner. You can get a decent portable generator for under $1,000, while standby generators can cost anywhere from $2,000 to $20,000 or more, depending on the size and features. However, standby generators offer unbeatable convenience and peace of mind. With a standby generator, you don’t have to worry about setting anything up or refueling during an outage. You can go about your daily life with minimal interruption, even during an extended power outage.

Is a Backup Generator Worth the Investment?

So, is a backup generator worth the cost? It depends on your specific needs and situation. Here are a few factors to consider: First, think about how often you experience power outages and how long they typically last. If you find yourself often in the dark because of long or frequent power outages, investing in a backup generator might just be a smart move. Consider what you need to power during an outage. If you work from home or have medical devices that require electricity, a generator is a must-have. If you just want to keep a few lights on and your phone charged, a smaller portable generator may suffice.

Considering Long-Term Benefits

While the upfront cost of a generator can be daunting, it’s important to consider the long-term benefits. A backup generator can provide peace of mind and safety during an outage, and it can even increase the value of your home. If you live in an area prone to natural disasters like hurricanes or wildfires, a generator can be a lifesaver. It can keep your family safe and comfortable until the power is restored.

Weighing Costs vs Peace of Mind

Ultimately, the decision to invest in a backup generator comes down to your personal priorities and budget. If you value uninterrupted power and peace of mind, a generator may be worth the cost. When considering a backup generator, it’s crucial to factor in these costs to get a comprehensive view of your investment. While the initial outlay might seem substantial, the peace of mind and comfort during power outages can make it a worthwhile investment.

Backup generators offer a reliable plan B during power outages, keeping essentials running. With options from portable to standby generators, they cater to various needs and budgets. They’re especially crucial for those relying on medical devices or living in areas prone to natural disasters. Weighing the cost against peace of mind is key when deciding if it’s worth the investment.

Conclusion

So there we have it—when storms rage outside and neighbors sit in darkness, those savvy enough to ask “are backup generators worth it” might just find themselves sipping hot coffee by lamplight instead of fretting over frozen pipes and dark screens. The truth spills out clear as day; while Hollywood has us fearing robots taking over our lives, maybe we’ve overlooked something simpler yet profoundly impactful—a reliable source of power that hums quietly behind scenes ensuring life marches on smoothly.

QG Smart Home is ready to help with your backup generator installations in Bucks County and surrounding area. Give us a call for a free estimate.

This quiet protector doesn’t look for a pat on the back but truly earns a shoutout for its role in bringing some much-needed steadiness to our often unpredictable lives. From safeguarding family dinners against interruption to preserving tranquility amidst turmoil—the verdict rings loud across households far and wide: Yes, they are absolutely worth considering.

4Apr

Need an Electrical Panel Upgrade for Solar?

by Nick Quirk

Need an Electrical Panel Upgrade for Solar?

Wondering whether you need to upgrade your electrical panel before jumping into the world of solar energy? A lot of homeowners scratch their heads over this one when they’re thinking about making a change. The truth is, the readiness of your home’s electrical system plays a crucial role in harnessing solar power efficiently. Not all homes are equipped out-of-the-box to handle modern solar installations – especially older properties or those not designed with renewable energy considerations in mind.

Before we get into it, QG Smart Home is fully insured electrician in Bucks County and surrounding area. If you are looking to upgrade your electrical panel for solar panels, give us a call for a free estimate.

Your journey towards sustainable energy starts here, as we explore why assessing and possibly upgrading your electric panel could be key to unlocking full solar potential without hitches.

Understanding Your Home’s Electrical Panel and Solar Compatibility

What is an Electrical Panel?

Your home’s electrical panel is like the heart of your electrical system. It’s the central hub that distributes electricity to all your appliances and devices.

Think of it as a control center that manages the flow of power throughout your home. Without it, your fridge wouldn’t cool, your lights wouldn’t shine, and your TV would be nothing more than a fancy paperweight.

How Solar Panels Affect Your Electrical System

Now, let’s throw solar panels into the mix. These marvels of technology harness the power of the sun and convert it into electricity for your home. Think of it as your very own little power station, right there on your roof.

But here’s the thing: that solar energy needs to flow through your electrical panel to reach your appliances. It’s like adding a new source of power to the grid, and your panel needs to be able to handle it.

Assessing Your Current Electrical Load

So, before you hop on board with solar energy, it’s a smart move to take a close look at your current electrical usage. Take a look at all the appliances and devices you have running in your home. Each one has its own electrical demand, measured in watts.

For example, a refrigerator might need around 100-200 watts, while a microwave can consume about 1000 watts. Add up all these demands, and you’ll get an idea of how much electricity your home needs at any given time.

Now, compare that to the capacity of your electrical panel, usually rated in amps (like 100A, 150A, or 200A). If your panel is already close to its limit with your current load, adding solar panels might push it over the edge.

Signs You Need an Electrical Panel Upgrade for Solar Installation

Age of Your Current Panel

If your home is older, chances are your electrical panel might be too. Older panels weren’t designed with solar in mind, and they might not have the capacity to handle the extra power flow.

If your panel is more than 20-25 years old, it’s probably time for an upgrade. Newer panels are built to accommodate the demands of modern living, including solar energy.

Capacity and Safety Concerns

Even if your panel isn’t ancient, it might still be undersized for your needs. If you’ve added new appliances or expanded your home over the years, your electrical demand has likely increased.

An overloaded panel is a safety hazard. It can lead to electrical fires, short circuits, and other dangerous situations. If your panel is showing signs of strain, like frequent breaker trips or buzzing sounds, it’s time for an upgrade.

The Impact of Adding Solar Panels

Solar panels can generate a significant amount of power, especially if you have a larger system. All that extra electricity flowing into your panel can be the straw that breaks the camel’s back, so to speak.

If your panel is already at or near capacity, the additional load from solar can cause overloaded circuits, tripped breakers, and even damage to your appliances. It’s like trying to fit too much water through a small pipe – eventually, something’s going to burst.

The Process and Benefits of Upgrading Your Electrical Panel for Solar

Steps to Upgrade Your Electric Panel

Upgrading your electrical panel isn’t a DIY job. Honestly, tackling this needs the know-how of a pro electrician. Here’s a general overview of the steps involved:

  1. Consultation: An electrician will assess your current panel and electrical load to determine the size and type of panel you need.
  2. Permits: Your electrician will obtain the necessary permits from your local building department.
  3. Installation: The old panel is removed, and the new one is installed. This may involve rewiring and rerouting electrical lines.
  4. Inspection: Before we wrap up, a final check is done to make sure the new panel passes all the safety checks and measures up.

How a New Panel Supports Larger Solar Systems and EV Chargers

A new, upgraded electrical panel doesn’t just accommodate solar panels. Plus, this smart move sets your home up nicely for any future electrical additions you might consider, like popping in a charger for an electric vehicle.

As more people switch to EVs, home charging stations are becoming increasingly common. These chargers require a dedicated circuit and can draw a significant amount of power. With an upgraded panel, you’ll have the capacity to install an EV charger without overloading your system.

Enhancing Energy Efficiency and Lowering Bills

An upgraded electrical panel, combined with solar energy, can significantly enhance your home’s energy efficiency. Solar panels generate clean, renewable electricity, reducing your reliance on the grid.

This not only lowers your carbon footprint but also translates to lower energy bills. In some cases, you might even generate more electricity than you use, allowing you to sell the excess back to the grid for a credit.

Understanding Building Codes Related to Solar Installations

Before you can install solar panels and upgrade your electrical panel, you’ll need to navigate the labyrinth of local building codes and regulations. These codes ensure that your installation is safe, efficient, and compliant.

Some common building code requirements for solar include:

  • Structural requirements: Your roof must be able to support the weight of the solar panels.
  • Electrical requirements: Your panel must meet certain specifications, like amperage and voltage.
  • Fire safety requirements: There must be clear access for firefighters to navigate around the panels in case of an emergency.

Working with Utility Companies for Grid Connection

In addition to building codes, you’ll also need to work with your local utility company to connect your solar system to the grid. This process, known as interconnection, allows you to draw power from the grid when your panels aren’t producing enough, and to send excess power back to the grid when you’re producing more than you need.

Your utility company will have specific requirements for interconnection, including:

  • Application process: You’ll need to submit an application and receive approval before connecting to the grid.
  • Equipment requirements: Your solar system and electrical panel must meet the utility’s specifications for safety and compatibility.
  • Metering: You may need to install a special meter that tracks the flow of electricity in both directions.

Navigating these codes and requirements can be complex, but a knowledgeable solar installer can guide you through the process. They’ll handle the paperwork, permits, and inspections, ensuring that your installation is compliant and connected.

Before going solar, check your electrical panel’s age and capacity. Older or overloaded panels need an upgrade for safety and to handle the extra power from solar. Upgrading not only supports solar but also future-proofs for EV chargers, boosts energy efficiency, and lowers bills.

Financial Considerations of an Electrical Panel Upgrade for Solar Energy Use

Let’s talk money. Upgrading your electrical panel for solar power isn’t just about the technical stuff – it’s also about the financial side of things.

Two key factors come into play here: the cost of the upgrade itself and the potential tax incentives and rebates you could get for going solar.

Estimating the Cost of an Electric Service Panel Upgrade

So, how much is this going to set you back? Well, the cost of upgrading your electric panel can vary quite a bit.

The cost really boils down to how big your place is, the nuts and bolts of getting it installed, and your zip code.

On average, you can expect to shell out anywhere from $500 to $2,500 for a panel upgrade. I know, it’s not pocket change.

But here’s the thing – in many cases, the electric panel upgrade or new installation may be one of the most costly parts of an overall solar system installation project.

However, it also enables the entire system to function properly and affords additional benefits as well.

Think of it like this: you’re not just paying for the panel itself, you’re investing in the foundation that’s going to make your whole solar setup work like a charm.

Tax Incentives and Rebates for Going Solar

Now, here’s the good news. When you decide to go solar, Uncle Sam actually wants to give you a pat on the back – in the form of some pretty sweet tax incentives and rebates.

One of the biggest ones is the Federal Solar Income Tax Credit. This bad boy was just increased to 30% of the total cost of your solar system.

That’s right, a tax credit is a dollar-for-dollar reduction in income taxes owed to the federal government. It’s like getting a big discount on your solar setup.

But wait, there’s more. Many states, local governments, and even some utility companies offer additional incentives for going solar.

You might find yourself happily surprised by some of the perks available, including cash back in your pocket, breaks on property taxes, and rewards that grow with how well you perform.

For example, California’s Self-Generation Incentive Program provides rebates for installing solar battery storage systems.

The amount of these incentives can vary widely depending on where you live, but they can significantly reduce the overall cost of your solar installation.

Frequently Asked Questions:

  1. How much does it typically cost to upgrade an electrical panel for solar?The cost of upgrading an electrical panel for solar can vary, but on average, it ranges from $500 to $2,500. The exact cost depends on factors like the size of your home, the complexity of the installation, and your location.
  2. Are there any tax incentives or rebates available for upgrading my panel for solar?
    Yes. The Federal Solar Income Tax Credit allows you to deduct 30% of the cost of installing a solar energy system from your federal taxes. Additionally, many states, local governments, and utility companies offer their own incentives, such as cash rebates or property tax exemptions.
  3. Can I include the cost of the panel upgrade when claiming the Federal Solar Tax Credit?Yes, you can. The cost of upgrading your electrical panel can be included in the total cost of your solar installation when claiming the 30% Federal Solar Income Tax Credit.
  4. Are the incentives the same in every state?No, incentives can vary significantly from state to state and even from one utility company to another. It’s best to check with your local government and utility provider to see what specific incentives are available in your area.
  5. How can I find out more about the incentives available in my area?The best place to start is with your state’s energy office or your local utility company. On top of helping you pick out the perfect solar setup, many companies are happy to clue you in on any sweet deals or incentives available where you live.

Remember, while the upfront cost of a panel upgrade might seem daunting, the long-term financial benefits of solar energy can be substantial.

With the right incentives and the energy savings over time, upgrading your electrical panel for solar can be a smart investment in your home and your future.

Upgrading your electrical panel for solar is an investment, not just a cost. You’ll pay upfront but save big with tax credits and rebates. It’s all about laying the right foundation for savings and efficiency in your solar journey.

Conclusion

The journey through understanding if do I need to upgrade my electrical panel for solar ends not just with clarity but also empowerment. You’ve walked through signs indicating a necessary update and discovered how this step can enhance both safety and efficiency within your home’s embrace of renewable energy.

This isn’t merely about meeting technical requirements; it’s about embracing change wisely, ensuring every component in our life aligns perfectly like pieces in a puzzle toward sustainability—our collective future depends on these mindful steps forward. So let me leave you with this thought: while AI might shape content creation or simplify chores around the house, at heart it serves us best when enhancing human efforts towards smarter living choices—including deciding on upgrades essential for integrating clean energy solutions like solar power seamlessly into our lives. No matter if you are looking for panel upgrades, smart home upgrades or generator installation in Montgomery County, PA, QG Smart Home can help you with all of your electrical needs.

1Apr

How to Become an Electrician in PA

by Nick Quirk

Steps to Kickstart Your Electrician Career

Ever thought about lighting up your career path by becoming an electrician? In Pennsylvania, where construction is booming, diving into this skilled trade isn’t just smart; it’s lucrative. You don’t need a college degree to start. But you do need training and experience that can come from attending a reputable trade school or enrolling in an apprenticeship program under a seasoned contractor. Imagine transforming from learning the ropes directly under expert guidance to mastering electrical systems—all within reach. Our electricians in Doylestown, PA and surrounding area all went through the appropriate training and we would love to provide insight for anyone looking to get in the trades.

Exploring the Path to Becoming an Electrician in Pennsylvania

Electricians are essential workers with a huge responsibility that goes beyond keeping the lights on. Diving into the world of electricians in PA is a fantastic first step if you’re eyeing this career.

Construction is one of Pennsylvania’s largest industries, and auxiliary construction trades like electrician are a vital part of the job.

Understanding the Job Description of an Electrician

Electricians install, maintain, and repair electrical systems in homes, businesses, and factories. They dive into blueprints, spot electrical issues with their trusty gadgets, and always play by the book when it comes to state and local codes.

It’s a hands-on job that requires critical thinking and problem-solving skills. Electricians work both indoors and outdoors in sometimes cramped or dirty conditions.

Why Choose a Career as an Electrician?

First off, you’re looking at an area that’s not only solid but also on the rise. The Bureau of Labor Statistics projects 7% growth for electrician jobs through 2031. That’s nearly 50,000 new jobs nationwide.

The pay is good too. In Pennsylvania, the average annual wage for electricians is $63,140. Experienced master electricians can earn even more.

Plus, you get paid while you train as an apprentice. It’s a great option if you want a reliable career without spending years in school.

Potential Career Paths for Electricians

Electricians can specialize in different areas like residential, commercial, or industrial work. Here are a few potential career paths:

  • Construction: Electricians may work on construction sites, where they install electrical systems in new buildings or renovate existing ones.
  • Maintenance: Some electricians work in maintenance departments for large companies, handling repairs and upgrades.
  • Self-employment: Experienced electricians can start their own businesses and work as independent contractors.

With experience, electricians can also move into roles like project manager, electrical engineer, or instructor in an apprenticeship program.

Educational and Training Requirements for Aspiring Electricians

To become an electrician in Pennsylvania, you do not need a college degree. However, you must receive sufficient training and experience. You can earn this by attending a trade school or community college with an electrician training program and serving as an apprentice underneath a licensed contractor.

A couple of cities with electrician programs in PA include:

  • Philadelphia Trade Schools
  • Pittsburgh Trade Schools

Accredited institutions provide certified coursework and hands-on training with the correct tools and equipment to meet industry standards. Always check to make sure the college or trade school you attend is state-approved.

After graduating, you should receive a certificate in electrical technology.

Enrolling in Electrical Apprenticeship Programs or Trade Schools

Formal education is a great starting point, but most of an electrician’s training happens through an apprenticeship. Apprenticeships combine classroom instruction with paid on-the-job training under a licensed electrician.

Apprenticeship programs are typically run by unions or contractor associations. They can last 4-5 years and include at least 144 hours of technical training and 2,000 hours of paid on-the-job training each year.

To enter an apprenticeship program, you usually need a high school diploma or equivalent, a passing grade on an aptitude test, and a clean drug test.

Gaining Direct Work Experience in the Electrical Field

During your apprenticeship, you’ll work under the direct supervision of an electrical contractor for 10 years or more.

You’ll start with basic tasks like drilling holes and setting anchors. As you gain experience, you’ll move on to more complex tasks like installing conduits, running wires, and connecting electrical devices.

Apprenticeships are an excellent way to earn while you learn. Plus, the hands-on experience is invaluable for developing the skills and knowledge you need to succeed as an electrician.

The Journey from Apprentice to Journeyman Electrician

Step one in becoming a licensed electrician in PA is to become an apprentice. You must be 18 years or older, have a high school diploma or GED, and have passed at least one year of high school algebra.

Most apprentices also must take an aptitude test involving basic math and reading skills.

Acquiring Technical Experience Required for a Journeyman License

During your apprenticeship, you’ll gain the technical experience required for a journeyman license. This includes learning how to:

  • Read blueprints and technical diagrams
  • Install, maintain and repair electrical wiring, equipment, and fixtures
  • Inspect electrical components like circuit breakers and transformers
  • Identify electrical problems using testing devices
  • Follow state and local building regulations based on the National Electric Code

You’ll also learn important safety practices since working with electricity can be dangerous. Apprentices must follow strict safety guidelines to protect themselves and those around them.

Sitting for the Journeyman Exam

After completing your apprenticeship, you can take the journeyman electrician exam. This tests your knowledge of the National Electrical Code, local building and electrical codes, and electrical theory.

Once you pass, you’ll receive your journeyman electrician license. This allows you to work independently on electrical systems without direct supervision.

Obtaining a journeyman license is a significant milestone. It demonstrates your competence and commitment to the trade. Once you snag that journeyman license, doors open up for you to tackle bigger projects and, even better, watch your paycheck grow.

Transitioning from Journeyman to Master Electrician

Once you’ve been working as a journeyman electrician for a few years, you may consider becoming a master electrician. A master electrician is the highest level of electrician certification.

Becoming a master electrician isn’t just about putting in the hours; it’s also about ticking off a few more boxes on your to-do list. These vary by location but often include:

  • Holding a journeyman license for a certain number of years
  • Completing additional classroom training
  • Passing a master electrician exam

Attaining Further Training After Receiving a Journeyman License

While not always required, many journeyman electricians choose to further their education. This can include taking courses on:

  • Electrical code updates
  • New technologies and products
  • Safety practices
  • Business management (for those interested in starting their own business)

Brushing up on your skills with some extra training not only keeps you sharp in the game but also puts you ahead in the race for those top-tier master electrician roles.

Why Consider Becoming a Master Electrician?

Becoming a master electrician comes with several benefits:

  • Higher earning potential. Master electricians typically earn more than journeyman electricians.
  • More job opportunities. Some states require a master electrician to be on staff for certain types of electrical work.
  • Ability to start your own business. In most states, you need a master electrician license to start your own electrical contracting business.
  • Leadership roles. Master electricians often take on supervisory roles, managing journeyman and apprentice electricians on job sites.

Becoming a master electrician can be a rewarding career move for those committed to the electrical trade.

Becoming an Independent Electrical Contractor in Pennsylvania

Many electricians dream of starting their own business. If you’re interested in becoming an independent electrical contractor in Pennsylvania, there are a few key steps you’ll need to follow.

Gaining Necessary Experience

Before you can become an independent contractor, you’ll need to gain the necessary experience. In most cases, this means:

  • Completing an apprenticeship program
  • Obtaining your journeyman electrician license
  • Working as a journeyman electrician for several years

During this time, pay attention to how the business operates. Dive into the nuts and bolts of bidding on jobs, steering your projects to success, and keeping your finances in check. This nugget of wisdom will come in super handy when you decide to launch your own business.

Obtaining an Independent Electrical Contractor License

To work as an independent electrical contractor in Pennsylvania, you’ll need to obtain the proper license. The requirements for this vary by municipality.

In general, you’ll need to:

  • Hold a master electrician license
  • Have a certain amount of experience working as an electrician
  • Pass a business and law exam
  • Show proof of liability and workers’ compensation insurance
  • Pay a licensing fee

An application and requirements can be downloaded from the City of Harrisburg here.

Once you have your license, you can start bidding on jobs and building your business. It’s a lot of work, but it can also be very rewarding to be your own boss and build something of your own.

Jumpstarting a career as an electrician in PA involves hands-on training and learning through apprenticeships, leading to good pay and job stability. No college degree is needed, but getting certified and moving up from apprentice to master electrician opens more opportunities.

Understanding Licensing Requirements for Electricians in Pennsylvania

Learning how to become an electrician in Pennsylvania doesn’t have a clear-cut answer. Since there’s no state-wide license for electricians, each city or county has its own licensing and requirements.

Electricians must abide by the construction industry guidelines and building codes in the area they intend to work. This guide shows details for the licensing process for Allentown, Pittsburgh, and Philadelphia as examples, since every city and county differs in its local rules for electricians.

Types of Electrical Licenses in Pennsylvania

To legally perform electrical services in Pennsylvania, you must comply with the state’s Home Improvement Consumer Protection Act. The state of Pennsylvania does not offer statewide registration, certification, or state licenses for electricians.

Each of the 2,562 municipalities maintains its own license requirements for electricians, plumbers, and HVAC contractors.

Steps to Get an Electrician License in Pennsylvania

If you’re aiming to become an electrician in Pennsylvania, there’s a path laid out for you that involves meeting specific education and legal requirements. These include:

  • Education: You must have a high school diploma or equivalent to pursue a career as an electrician. Some electricians also choose to complete a formal electrical training program from a vocational school or community college.
  • Remember, becoming an electrician requires a combination of education, practical training, and licensing. By following the necessary steps and obtaining the required qualifications, you can embark on a rewarding career as an electrician in Pennsylvania.

Costs and Timeframe for Getting an Electrician License

The cost of electrician license in Pennsylvania varies depending on the city or county. Typically, the fees range from $50 to $200 for the application and exam.

The timeframe for getting licensed also differs based on local requirements. Most apprenticeship programs take 4-5 years to complete, after which you can apply for a journeyman license. Becoming a master electrician usually requires an additional 2-4 years of experience.

Exploring Potential Earnings as a Licensed Electrician in Pennsylvania

Being an electrician isn’t just a job, it’s a solid career path. Electricians have their pick of jobs and make a pretty decent living, too.

There’s also job security—customers will always need skilled trade professionals to install and service electrical systems in their homes and businesses.

Average Salary for Electricians in Pennsylvania

The U.S. Bureau of Labor Statistics reports that there are 711,200 electricians nationwide and 19,390 work in Pennsylvania. The national number is predicted to grow 7% from 2024 to 2031, adding more than 50,000 to the ranks.

That growth rate is expected to be a little higher in Pennsylvania — projected at 10%, according to CareerOneStop, the U.S. Department of Labor’s job search website.

Salary Variations by City

Electrician salaries in Pennsylvania can vary quite a bit depending on which city you work in. For example, in Philadelphia the average annual salary is $61,132, while in Pittsburgh it’s $58,947.

Also, your paycheck can get a boost (or not) from several other things like how long you’ve been in the game, what specific electrical wizardry you’re good at, and if you’re flying solo or are part of a larger crew. Snagging a few extra certifications could really pump up what you make, too.

Key Takeaway: 

Becoming an electrician in PA means navigating local licensing requirements, combining education with practical training, and investing time. It’s a solid career choice that promises job security and good earnings.

Conclusion

Every wire connected brings us closer not just to powering homes but igniting dreams—your dream of becoming an electrician in PA can turn into reality with determination and the right guidance. This isn’t about dodging Hollywood’s grim portrayals of robots taking over jobs; it’s far simpler yet profound than that.

Becoming part of Pennsylvania’s vibrant construction industry means more than joining one of its largest sectors—it signifies embarking on a fulfilling journey towards expertise in a field where demand skyrockets as technology evolves.

The truth is out there—clear as daylight for those willing to see it. And today marks another milestone I share with you as we pave paths not just within electrical circuits but across careers poised for growth amidst automation waves without fear but readiness—for adaptability becomes our greatest tool.”

Our trained electricians in Bucks County are ready to help homeowners and business owners with any electrical needs.

1Apr

Guide: How to Add a Motion Sensor to an Outdoor Light

by Nick Quirk

Let’s dive right into how to add a motion sensor to an outdoor light. This guide is your flashlight in the dark, guiding you through selecting the right motion sensor that matches your existing lights and saves on electricity costs. We’ll cover everything from safety steps like turning off power at the breaker panel to choosing between wiring options for your setup. By following this step-by-step process, not only will you enhance home security but also make outdoor gatherings more welcoming without wasting electricity or leaving lights on all night. So grab your tools; it’s time to shed some light on making outdoor spaces smarter and safer. QG Smart Home can install motion sensors to your outdoor lights in the Main Line and surrounding area.

Choosing the Right Motion Sensor for Your Outdoor Light

Assessing Compatibility with Existing Fixtures

Finding a motion sensor that plays nice with your existing outdoor light can feel like trying to find a needle in a haystack. The trick is to start by checking the wattage rating of the potential sensor—it must match or exceed what your current fixtures use. This ensures it can handle the load without any issues. But, there’s another catch: not all sensors are friends with compact fluorescent (CF) light bulbs.

If you’re leaning towards energy-saving CF bulbs, make sure to pick a sensor that supports them. It’s an easy oversight but one that could save you from flickering lights and other frustrations down the road.

Energy Efficiency and Bulb Compatibility

The marriage between motion sensors and energy-efficient lighting options is not just about compatibility; it’s also about making smart choices for reducing electricity costs. By integrating motion-sensitive technology, your lights only turn on when needed—no more wasting electricity by leaving lights on all night because someone forgot to switch them off.

This setup isn’t just kinder to your wallet; it’s also better for our planet. Plus, using sensors designed for built-in motion detection ensures seamless operation whether dusk till dawn or during specific hours set by you. Remember though, getting this right means ensuring both bulb type and power requirements align perfectly with what your chosen sensor can support.

Installation Basics for Adding a Motion Sensor

Safety First: Turning Off Power

Before you even think about touching your outdoor light, make sure the power is off. This isn’t just a friendly suggestion; it’s an absolute must to prevent electrocution. Head over to your breaker panel and flip the switch that powers your outdoor lights. Double-check with a voltage tester because guessing games can be shocking in all the wrong ways.

To install motion sensor lights effectively, knowing where to mount them is key. They should hang out 6 to 10 ft above ground level, which puts them in the perfect spot to catch any sneaky movement without being triggered by every passing cat or blowing leaf.

Cable management might not sound thrilling, but it’s crucial for safety and aesthetics. Use plastic cable staples that promise both security and subtlety – no more tripping over loose wires or ruining your home’s curb appeal.

Wiring Options and Techniques

The journey of wiring starts at deciding whether you want power drawn from a switch box or directly from the fixture itself. Both paths lead to Rome, but they offer different scenery along the way.

If this feels like deciphering ancient runes, fear not. The secret lies within two main options—each with its own charm. Choosing between drawing power from a switch box or directly from an existing fixture boils down mostly to personal preference and setup convenience.

Tools and Materials Checklist

You’re going on an adventure – one that requires specific tools beyond sheer willpower alone. Arm yourself with wire stripper/cutters sharper than Excalibur itself; let voltage testers guide you through electrical mysteries safely; embrace wire nuts as if they’re precious jewels securing connections tightly; finally don’t forget grounding wires – these unsung heroes ensure everything stays safe during those stormy nights when Thor decides he wants disco lighting outside his window too.

Key Takeaway: Before diving into adding a motion sensor to your outdoor light, turn off the power to stay safe. Mount sensors 6-10 ft high for best results and use cable staples for neat wiring. Choose between connecting through a switch box or directly from the fixture, and gather essential tools like wire strippers and voltage testers.

Wiring Options and Techniques

When it comes to adding a motion sensor to your outdoor lights, knowing your wiring options is crucial. You have two main paths: tapping into the power from an existing light fixture or drawing power directly from a switch box. Each method has its nuances and choosing the right one depends on your setup.

Powering From an Existing Light Fixture

Drawing power from an existing fixture can be straightforward if you’re comfortable with electrical work. First, make sure to turn off the power at the breaker panel; safety first. Then, open up the electrical box of your outdoor light. Here’s where you’ll find three wires – hot (usually black), neutral (white), and ground (green or bare). Connect these to their counterparts on both the motion sensor and light according to manufacturer instructions using wire nuts for secure connections.

This option works well when you want minimal changes to wall switches or prefer not having visible extra devices next to them. Just remember, handling hot wires requires caution – always use a voltage tester before touching any wires.

Drawing Power Directly From a Switch Box

If direct control over when your lights activate appeals more, consider wiring through a switch box instead. This involves slightly more complex electrical work but offers greater flexibility in controlling multiple lighting fixtures independently of each other.

You’ll still start by ensuring all related circuits are powered down via the breaker panel. Next, inside the switch box connect new cables running towards where you plan on installing your motion sensor—following similar steps regarding matching wire colors as mentioned earlier—and ensure grounding is properly handled with suitable ground wire techniques for maximum safety.

Tools and Materials Checklist

Gearing up to add a motion sensor to your outdoor light isn’t just about bravado; it’s about being prepared. The right tools and materials can turn what sounds like a weekend headache into an afternoon’s triumph.

Essential Tools Include Wire Stripper/Cutter and Voltage Tester

To start, you’ll need a wire stripper/cutter. This tool is crucial for safely removing insulation from electrical wires without damaging them. Another non-negotiable tool is the voltage tester. Before touching any wires, use this device to make sure the power is off—because surprises are only fun at birthday parties, not during DIY projects.

Apart from these two heroes in your toolkit, don’t forget sturdy gloves for protection and safety glasses because flying debris doesn’t discriminate.

Materials Include Wire Nuts and Ground Wire

The heart of this operation lies within the small but mighty wire nuts. These little caps secure connections between wires ensuring that your new setup won’t just fall apart or cause shorts—a big win for home safety. Equally important is the ground wire which helps prevent electric shock by providing a path back to earth in case of fault conditions.

You also want to follow the manufacturer’s instructions closely when wiring everything together. They contain vital information on connecting each piece correctly so that your motion sensor works as intended without becoming an impromptu fireworks display.

Step-by-Step Guide to Installing Your Motion Sensor

Mounting Your Motion Sensor Properly

Finding the perfect spot for your motion sensor is like playing hide and seek with the sun. You want it high enough, between 6 to 10 ft above ground, so it doesn’t play tag with every passing cat but still catches uninvited guests. Make sure it faces away from direct sunlight and potential moving objects like swaying branches that could trigger false alarms.

The angle matters too. Adjusting the sensor’s direction ensures maximum coverage without leaving blind spots where intruders might slip through unnoticed. Think of it as setting up a security camera; you aim for broad views over key areas.

Connecting Wires According to Diagrams

This part is where things get spicy—like trying to follow a recipe written by an electrician gourmet chef. First off, power down at the breaker panel because nobody wants an electrifying surprise mid-installation. Safety always comes first.

You’ve got two main options: drawing power directly from an existing light fixture or routing it through a switch box. It’s crucial here that your cable matches the gauge of existing cables; this keeps everything safe and up to code (and avoids turning your DIY project into a fireworks display). Then grab those wire nuts—it’s time to twist wires together following manufacturer guidelines closely. Red goes with red, black meets black, and don’t forget about grounding yourself in green or bare copper companionship.

Last but not least, flip that breaker back on and watch as your outdoor spaces become guarded by beams of invisible light—ready to alert you at any sign of movement without wasting electricity during daylight hours thanks to our trusty friend: The motion sensor.

Key Takeaway: 

Finding the right spot and angle for your motion sensor is key—think hide and seek with security in mind. Safety first when wiring: power down, match cable gauges, and follow guidelines to avoid shocks. Finally, switch on for a safer, energy-efficient outdoor space.

Testing and Adjusting Your New Motion Sensor Setup

You’ve crossed the finish line with installing your outdoor motion sensor, but before you celebrate, there’s a crucial step left: making sure it works like a charm. This means testing its detection range and tweaking settings to match your needs from dusk till dawn.

Test Detection Range

To kick things off, check if your new buddy can spot movement as far as 70 feet away. This isn’t just about bragging rights; it’s vital for ensuring every corner of your yard is under watchful eyes. Move around in different areas within this range to see if the lights turn on without fail. If spots are missed or the sensor reacts slower than expected, repositioning might be needed.

Motion sensors aren’t one-size-fits-all—each has unique angles and ranges they cover best. Finding that sweet spot where your sensor detects movement accurately without false alarms (like from pets or trees) is key.

Adjust Settings

Now let’s get those settings dialed in right so you’re not wasting electricity or leaving dark spots unlit when they shouldn’t be. Most sensors allow adjustments for how long lights stay on after detecting motion and at what light level they should activate. Outdoor light motion sensors typically include an option to set operations from dusk till dawn, preventing daylight operation and saving on those energy bills.

Fine-tuning these options ensures that you’re not greeted by darkness when taking out trash late at night nor waking up neighbors with floodlights during a raccoon visitation hour. Remember, finding the perfect balance might take a few nights of observation and adjustment—but it’ll be worth every minute for peace of mind and efficiency gains.

Alternative Solutions: Motion-Sensitive Bulbs

Motion-Sensitive Bulbs: An Easy Install Solution

If you’re not too keen on fiddling with wires and electrical boxes, motion-sensitive bulbs are your go-to solution. These ingenious devices come with built-in sensors that detect movement, making them a straightforward alternative for upgrading outdoor lighting without the hassle of extensive wiring. Ideal for those who may feel out of their depth with traditional electrical work, installing these bulbs is as simple as screwing in a light bulb—literally.

The beauty of motion-sensitive bulbs lies in their simplicity. They fit into existing fixtures effortlessly, allowing you to add an element of security and convenience to your home without needing an electrician’s help or navigating complicated installation processes. This approach saves time and sidesteps potential frustration while still enhancing your home’s exterior lighting.

Limits to Consider With Built-In Sensors

While motion-sensitive bulbs offer undeniable ease of install, it’s important to note they might not cover as wide a detection range compared to standalone sensors. The area these bulbs can monitor is generally limited by their placement within existing fixtures which could reduce the effectiveness in larger spaces or more complex layouts.

This limitation doesn’t make them any less valuable for many users; it simply means assessing your space before deciding if this easy upgrade fits your needs perfectly or if further solutions should be explored for comprehensive coverage. Despite this caveat, these innovative products represent a leap towards smarter homes accessible even to those wary about diving deep into DIY projects related to outdoor lighting enhancements.

To explore options available right now, check out some popular choices on Amazon.

Maintenance Tips For Long-Term Reliability

Ensuring your motion detector lights keep the bogeyman at bay and don’t cry wolf involves a bit more than just installing them. It’s about giving them some TLC so they can do their job without hiccup.

Clean Sensor Regularly

Dust, spider webs, or even an ambitious bird looking to nest can turn your sophisticated sensor into a disco ball for squirrels. A simple wipe down with a damp cloth every few months keeps it clean and prevents false triggers that could have you peering out the window at all hours of the night. Remember, regular cleaning is not just about aesthetics; it ensures your sensors detect movement accurately when needed.

A practical tip? Check out this handy motion detection kit on Amazon. It’s got everything you need to maintain your outdoor lighting setup effectively.

Periodic Testing Ensures Accuracy

We’ve all been there—setting up something perfectly only to find it behaving like it has a mind of its own weeks later. To avoid this twilight zone scenario with your motion sensor lights, periodic testing is key. This isn’t rocket science; simply walk in front of the sensors at different times of day to make sure they light up as expected.

By maintaining and testing regularly, you’re not just saving yourself from potential headaches (or unexpected darkness); you’re also ensuring those little electronic guardians are always ready to shine brightly on anything that goes bump in the night—or tries sneaking around during broad daylight for that matter.

Conclusion

By now, you’ve navigated the ins and outs of how to add a motion sensor to an outdoor light. This journey has equipped you with the know-how from selecting the right sensor that meshes with your existing setup to mastering installation basics for safety and efficiency.

You learned the importance of matching wattage ratings and ensuring compatibility with energy-saving bulbs. You discovered wiring options that best suit your lighting scenario, alongside a toolkit checklist tailored for this DIY project.

The step-by-step guide aimed at making outdoor spaces smarter didn’t just stop at installation; it stretched into testing, adjusting, and even exploring simpler alternatives like motion-sensitive bulbs for those less inclined towards complex setups.

Remember: enhancing home security while cutting down on electricity costs is achievable. With patience and precision, upgrading your outdoor lighting can be both rewarding and illuminating. Give us a call for free estimates, our electricians in the Main Line and surrounding area are ready to help improve your home.

1Apr

Brighten Your Nights: How to Light a Pool Deck Effectively

by Nick Quirk

So you’ve decided it’s time your pool deck stepped out of the shadows. Well, you’re in luck because lighting up that area isn’t just about adding bulbs around water; it’s an art form. If “how to light a pool deck” has been sitting at the top of your Google searches lately, breathe easy. We’re about to walk through some simple yet transformative ways to bring luminance and life back into those evening swims without turning your backyard into a spaceship launch pad.

QG Smart Home can help improve your pool deck lighting with our outdoor entertainment packages. We also work closely with a pool servicing company in Montgomery County, PA if there are any needs for your pool servicing or pool lighting.

Lights have this magic trick – they can make even the simplest spaces look like scenes from high-end resorts. Whether it’s subtle glows highlighting key features or dramatic beams creating contrast and depth, we’re diving right in (pun intended)!

Exploring Pool Deck Lighting Ideas

Summer is finally here and the swimming pool in your home will take center stage once again. With summer coming, you need to make sure the lights you have around your pool don’t attract bugs. Find out what type of lights don’t attract bugs in another article by us.

As a proud pool owner, you need to find ways to make your pool a safe and inviting space throughout the day and in the night. During the day, you won’t have to do much. What majestic body of water doesn’t catch the eye in an outdoor living space (or indoor one), after all?

When the sun sets, though, you’ll need to light up your pool area to ensure it remains a safe and aesthetically pleasing outdoor space. With that in mind, this article will explore the benefits of lighting your pool and six effective pool lighting ideas for your swimming pool and its surrounding areas.

Creating the Desired Ambiance with Lights

The primary benefits of lighting your swimming pool are aesthetic and practical. You can find out what lumens your outdoor lights should be to help with the ambiance of your outdoor space.

Tasteful lighting can make your pool area a place to gather with friends and family. You can also use your lighting to create an ambiance. Lighting, after all, affects mood. Soft light, in particular, makes the environment more relaxing.

Moreover, by illuminating specific pool features, such as waterfalls or landscaping, you can highlight the unique elements of your pool, adding to its visual appeal.

The secondary benefit of lighting your pool area is the health and safety element. People are less likely to get into accidents in the pool or fall from the pool deck into the water when they can see where they’re going.

With this in mind, let’s look at six pool lighting ideas you can implement to enjoy the perfect pool experience this summer.

Incorporating Variety in Your Lighting Choices

When it comes to lighting fixtures for a pool deck, there are a few types that work best. LED strip lights are a popular choice as they can be easily installed and provide a soft, ambient glow. In-ground spotlight is also recommended as it can illuminate specific features of the pool deck, such as palm trees or decorative elements. Also, lights that run on solar power don’t just save energy – they’re kind to the planet too.

Utilizing Natural Light Sources

You can complement the electric lighting with fire features like lanterns, tiki torches, or statement fire bowls. The dancing flames by the poolside really kick up the cozy vibes, don’t they? At the same time, the flames will provide a welcome warmth around the deck, making it cozy for pool parties in the evening hours.

Choosing the Right Lighting for Your Pool Deck

Considering Pool-Safe Materials

When selecting lights, you need to choose appropriate light fixtures that can withstand outdoor elements, especially water, considering they will be installed around the pool. Some of the best materials for outdoor pool deck lighting include bronze, brass, and stainless steel.

Selecting Suitable Lights for Your Pool Type

There are various options to light up your deck, like post lighting, where you install pool lights on top of deck posts and railing posts. You can also use in-ground lights, like recessed mini narrow spot-up lights, to illuminate your decking.

Investing in Programmable LED Lighting

Some creative ways to incorporate lighting into the design of a pool deck include using LED strip lights to line the edges of the deck, installing underwater lighting in the pool for a dramatic effect, incorporating solar-powered lanterns or stake lights for a sustainable and decorative touch, utilizing recessed lighting fixtures along the stairs or pathways, and adding string lights or hanging lanterns to create a cozy ambiance.

Lighting Techniques for Enhancing Your Pool Deck

Illuminating the Exterior and Interior of the Pool

Some creative ways to incorporate lighting into the design of a pool deck include using LED strip lights to line the edges of the deck, installing underwater lighting in the pool for a dramatic effect, incorporating solar-powered lanterns or stake lights for a sustainable and decorative touch, utilizing recessed lighting fixtures along the stairs or pathways, and adding string lights or hanging lanterns to create a cozy ambiance.

Using Underwater Lighting for Water Features

Some creative ways to incorporate lighting into the design of a pool deck include using LED strip lights to line the edges of the deck, installing underwater lighting in the pool for a dramatic effect, incorporating solar-powered lanterns or stake lights for a sustainable and decorative touch, utilizing recessed lighting fixtures along the stairs or pathways, and adding string lights or hanging lanterns to create a cozy ambiance.

Highlighting Stairs and Pathways

Some creative ways to incorporate lighting into the design of a pool deck include using LED strip lights to line the edges of the deck, installing underwater lighting in the pool for a dramatic effect, incorporating solar-powered lanterns or stake lights for a sustainable and decorative touch, utilizing recessed lighting fixtures along the stairs or pathways, and adding string lights or hanging lanterns to create a cozy ambiance.

Safety Considerations When Lighting a Pool Deck

Ensuring Safe Installation of Lights

If you have kids or like hosting regular get-togethers over the summer, there’s a strong likelihood that your pool sees a lot of activity and foot traffic. One way to avoid damaging a light fixture—or worse, having an injured guest—is through deck lighting.

Lighting Up the Deck Area for Safety

Besides the practical illumination, deck lighting also creates an aesthetic appeal to your pool area.

Working with Floor Deck Lights

There are various options to light up your deck, like post lighting, where you install pool lights on top of deck posts and railing posts. You can also use in-ground lights, like our recessed mini narrow spot-up lights, to illuminate your decking.

Light up your pool deck to blend safety with style. Use LED strips for a soft glow, spotlight features with in-ground lights, and add warmth with fire elements. Choose durable materials like bronze or stainless steel and consider programmable LEDs for versatility.

Innovative Ways to Light Your Pool Deck

Want to take your pool deck lighting to the next level? It’s time to get creative and think outside the box.

With a few innovative lighting techniques, you can transform your outdoor space into a stunning oasis that’s perfect for entertaining or relaxing after a long day.

Using Directional Lights for Structures and Greenery

Directional lights are a game-changer when it comes to highlighting the unique features of your pool deck. With the right lighting setup, you can spotlight cool features like pergolas or gazebos, adding layers and a bit of drama to your outdoor space.

But don’t stop there. Use directional lights to showcase the beautiful greenery surrounding your pool area. Shining lights up into trees or bushes can seriously turn up the drama and amp up the vibe of any space.

According to CAST Lighting, “Some creative ways to incorporate lighting into the design of a pool deck include using LED strip lights to line the edges of the deck, installing underwater lighting in the pool for a dramatic effect, incorporating solar-powered lanterns or stake lights for a sustainable and decorative touch, utilizing recessed lighting fixtures along the stairs or pathways, and adding string lights or hanging lanterns to create a cozy ambiance.”

Creating Mood with Dimmers and Lighting Zones

Want to take your pool parties to the next level? Dimmers and lighting zones are your secret weapons.

By installing dimmers, you can easily adjust the brightness of your lights to create the perfect mood for any occasion. Hosting a romantic dinner for two? Dim the lights for a cozy, intimate vibe. Throwing a lively pool party? Turn up the brightness to keep the energy high.

But why stop there? Consider creating different lighting zones around your pool deck to add visual interest and flexibility. You can have one zone for dining, another for lounging, and even a separate zone for the pool itself. “There are various ways you can illuminate your pool decking. We discussed ten ways you can light up your decking in this post. For example, you can use niche lighting over your deck. Consider also using dimmers so you can set the ambiance for the evening,” suggests CAST Lighting.

Highlighting Unique Features of Your Pool

Every pool is unique, so why not showcase what makes yours special? Whether it’s a stunning waterfall, a cozy fire pit, or a luxurious spa, highlighting these features with the right lighting can take your pool deck to the next level.

One of the simplest ways to illuminate your pool deck area is by hanging string lights around the perimeter. These affordable and energy-efficient lights offer an intimate and relaxing atmosphere that provides ample lighting without being too bright.

So, what are you waiting for? Get creative with your pool deck lighting and transform your outdoor space into a true oasis. Use these cool tricks, and before you know it, everyone on your street will wish they were as savvy as you.

Get creative and light up your pool deck with directional lights, dimmers, and unique lighting zones. Make each feature shine, from greenery to architectural elements, setting the perfect mood for any occasion.

Conclusion

All movies with robots might show them plotting our downfall under neon lights but here’s something less dramatic and far more useful – illuminating our outdoor havens effectively. That whole “how to light a pool deck” query? It turns out; there wasn’t any dark sorcery needed after all – just good old-fashioned planning and creativity.

We walked through LED strips tickling the edges of our decks like shy fireflies, underwater fixtures bringing Atlantis vibes straight into our homes, and tiki torches casting tall tales onto excited faces gathered around warmth and stories. And while Hollywood spins yarns of AI uprising under harsh spotlights,

Contact QG Smart Home if you are in Pennsylvania and need outdoor lighting in Bucks County area. Our electricians in Bucks County and surrounding area are ready to help with your pool deck lighting, give us a call today.

I’m here flipping switches on soft-lit gatherings where laughter floats above illuminated waters.

28Mar

How Do Backup Generators Work?

by Nick Quirk

Ever wondered how some homes stay bright even when the rest of the neighborhood is engulfed in darkness during a power outage? The secret lies in backup generators. These silent heroes work tirelessly, ensuring that life goes on uninterrupted by providing essential power. But how do backup generators work?

At its core, a backup generator acts as an emergency power source, kicking into action the moment your main electricity supply cuts off. From powering crucial appliances to keeping your home comfortable and safe, these devices are more than just luxury; they’re becoming a necessity. At QG Smart Home we offer generator installations in Bucks County and surrounding area.

Understanding the Basics of Backup Generators

Backup generators are the unsung heroes of power outages. They swoop in to save the day when the grid goes down, keeping your lights on and your fridge cold.

But what exactly are these magical machines? Let’s break it down.

What is a Backup Generator?

A backup generator is like a trusty sidekick for your home’s electrical system. It’s a device that provides backup power when the main power source fails.

Unlike standby generators, which are permanently installed and automatically kick in during outages, backup generators are portable and only provide temporary power.

Components of a Backup Generator

Backup generators run on various fuels, depending on what you have available and how you plan to use the system.

The fuel source you choose will determine the components of your backup generator. Some common fuel types include:

  • Gasoline
  • Diesel
  • Propane
  • Natural Gas

The Working Mechanism of Backup Generators

Now that we know what backup generators are, let’s dive into how they actually work.

Think of it as magic’s practical cousin – it’s all about the science and skips out on the wand-waving theatrics.

How Does a Home Backup Generator Work?

A backup generator is a secondary electrical system that automatically provides power during outages. This means your must-have gadgets and appliances keep humming along, even when the main power supply decides to take a break.

When the power goes out, the backup generator detects the interruption and springs into action, supplying electricity to your home’s critical circuits.

The Role of Automatic Transfer Switch in Power Restoration

The real MVP of the backup generator system is the automatic transfer switch (ATS). This device is the brains of the operation, detecting power outages and signaling the generator to start up.

Once the generator is running, the ATS seamlessly switches your home’s power source from the grid to the generator. And when the power is restored, it switches back. All without you lifting a finger.

Types of Generators: Standby vs. Portable

When it comes to backup power, you’ve got options. The two main types of generators are standby and portable.

But which one is right for you? Let’s compare the two.

Understanding Standby Generators

Standby generators, also known as whole-house generators, are the ultimate in backup power convenience. They’re permanently installed and connected to your home’s electrical system.

When the power goes out, a standby generator automatically kicks in, providing seamless power to your entire home. No need to manually start it up or plug in your appliances.

Benefits and Limitations of Portable Generators

Portable generators are the more affordable and flexible option. They’re smaller and can be moved around as needed.

However, they require manual setup and can only power a limited number of appliances at a time. You’ll need to plug in your devices directly to the generator using extension cords.

Choosing the Right Size for Your Needs

But how do you know which size is right for your home?

Don’t worry, we’ve got you covered.

Determining the Appropriate Size for Your Home

To determine the right size generator for your needs, you’ll need to consider two key factors: running wattage and surge wattage.

Running wattage is the continuous power your appliances need to operate, while surge wattage is the extra power needed to start up electric motors in devices like refrigerators and air conditioners.

Why Size Matters in Choosing a Generator

Choosing the right size generator is crucial. If you go too small, you won’t be able to power all your essential appliances. But if you go too big, you’ll be wasting money on a system you don’t fully utilize.

A whole-house generator is the most powerful option, capable of powering your entire home. But it’s also the most expensive. Portable generators are more affordable but have limited power output.

Installation and Maintenance of Backup Generators

Installing a backup generator is not a DIY project. It requires professional expertise to ensure it’s done safely and correctly.

Once you’ve got your generator set up, remember that giving it a regular tune-up is the secret to keeping it running smoothly.

Why You Need a Trustworthy Generator Installer

A trustworthy generator installer is essential for several reasons:

  • They have the knowledge and experience to properly size and install your generator
  • They ensure your generator meets all local codes and regulations
  • They can provide ongoing maintenance and support

Maintaining Your Backup Generator for Optimal Performance

Regular maintenance is crucial for keeping your backup generator in top condition. This includes:

  • Checking and changing the oil
  • Replacing air and fuel filters
  • Testing the battery and charging system
  • Running the generator regularly to keep it in good working order

A well-maintained generator will be ready to go when you need it most.

Key Takeaway: 

Backup generators are your go-to power heroes during outages, offering a seamless switch to keep essentials running. They come in portable and standby types, each with unique benefits. Choosing the right one involves considering size based on your needs and ensuring regular maintenance for peak performance.

Conclusion

All movies about AI have painted robots as our biggest adversaries. Similarly, misconceptions swirl around backup generators—too complex or unnecessary until you’re left fumbling in the dark looking for candles during an unexpected blackout. The truth couldn’t be further from this portrayal.

How do backup generators work? They stand guard silently but effectively against disruptions caused by utility failures—not unlike those smart assistants or fraud detection systems that operate quietly behind scenes making our lives easier without much ado.

This exploration reveals not only their simplicity but underscores their significance in today’s world—a far cry from being mere conveniences to fundamental components ensuring continuity and comfort amidst chaos caused by natural disasters or sudden electrical faults.